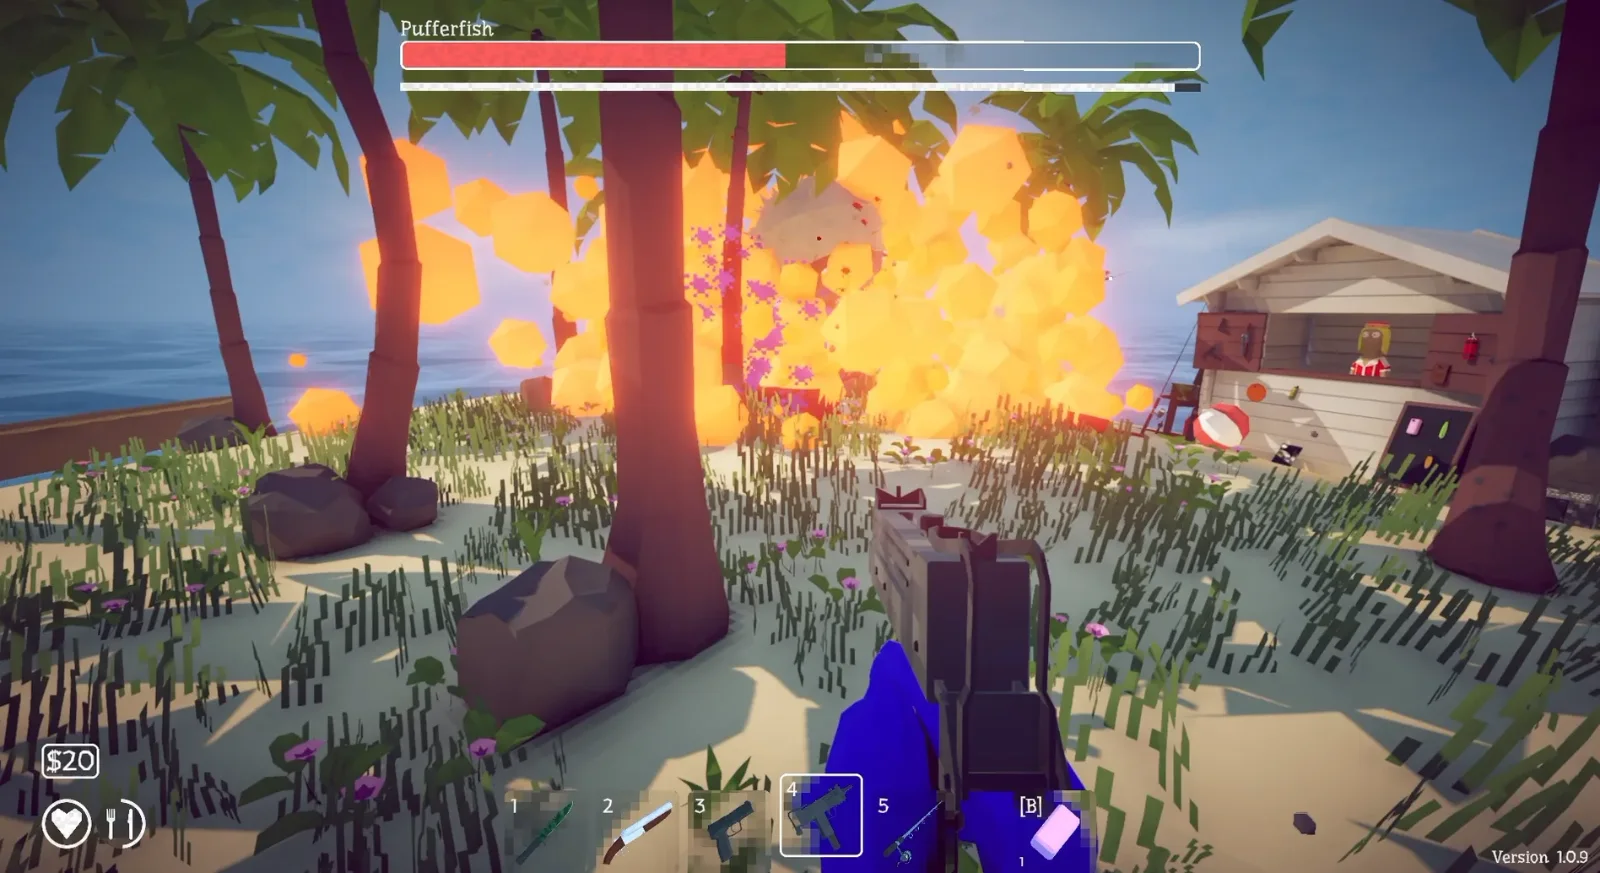
The Pufferfish is the third boss in How to Fish and the gate to the fourth island, so every run has to deal with it sooner or later. The reliable kill is bait, not bullets: reel the fish in with the Carrot, detonate it over a prepared pile of dynamite, then finish the enlarged second form with an upgraded Uzi while staying off its poison trail. Trying to melee it is the fastest way to die on this island. This guide covers the full unlock chain, the loadout actually worth buying, and both phases of the fight.
How to Unlock the Pufferfish Boss
The fight is locked behind a short quest chain on the third island. Find the Tourist, an NPC in an orange life preserver and a hat, leaning against a palm tree. Before he hands you the Carrot bait that starts the boss fight, he wants you to catch an Endangered Species fish. On island 3 you have three options: the Needlenose, the Seahorse, or the Bowlfish.
For that you need the Fishing Rod ($3 from the vendor) and a Standard Lure ($15). Lures wear out after a few catches and can be lost, so buy a spare or two; if you are short on cash, the fastest legal money is selling your catch, and the full fish price table shows which fish are worth the inventory space. Hand any one of the endangered fish to the Tourist and you receive the Carrot.
The fight itself takes place around the dynamite vendor's shop on the same island. Attach the Carrot to your rod, cast at the water by the shop, and reel the Pufferfish in. The boss fight starts the moment it lands.
The Loadout Worth Buying
Three purchases matter, and skipping any of them makes this fight noticeably worse.
First, the Uzi from the vendor, upgraded at the ammunition box next to him. Keep feeding it upgrades until the box tells you that you have reached the maximum upgrade for this island. Second, the Compensator upgrade for $600. It sounds like a luxury; it is not. The Uzi has heavy recoil, and phase 2 of this fight is a running gunfight where every missed burst costs you distance. Third, dynamite at $25 a stick. Bring 18 to 20 sticks, which is $450 to $500 at $25 apiece, and drop them in a pile in the open center of the island before you cast the Carrot.
⚠️ Unconfirmed. The exact reward the Tourist gives for the Pufferfish Fin is not documented consistently across community guides yet.
Phase 1: Blow Up the Small Pufferfish
When the Pufferfish first lands it is small, fast, and barely takes damage from bullets. Do not treat this phase as a gunfight. Your dynamite pile is the answer.
From a safe distance, lure the small Pufferfish toward the pile, then shoot the pile with any ranged weapon. The chained explosion deals heavy damage in one hit, which is the entire point of the setup. Two rules keep this phase from going wrong: never stand near your own pile when it goes off, and do not cast the Carrot until the pile is already laid out where the fight happens.
If you would rather not use the pile at all, there is a cheaper solo pattern: stand in the doorway of the vendor's shop, where the building blocks most of the poison spray, and throw individual sticks of dynamite from range. Watch your throwing distance, because your own blast radius is fully capable of killing you, and this pattern burns noticeably more dynamite than the one-shot pile.
Phase 2: Kill the Enlarged Pufferfish
The Pufferfish survives the explosion and comes back much larger. This is the gunfight phase, and honestly the easier of the two: the big target is easy to hit, and it now takes real damage from the Uzi.
Its new tricks are a purple poison trail it leaves as it rolls around, which deals heavy damage if you walk through it, and left to right dashes that punish standing still. Keep moving around the island's perimeter, put trees between you and the fish when it charges, and kite it around the cooking grill if the fight drifts near it; the tight circle around the grill forces its dashes into wide arcs that are easy to read. Stay on the Uzi until the health bar is gone.
One cleanup detail: the explosion often throws the loot some distance away, sometimes into the water. Press Space to glide across the surface and pick it up instead of swimming the long way around. The drop you are looking for is the Pufferfish Fin. Hand it to the Tourist to complete the quest, and the fourth island opens; if you have not already sorted out fast travel between islands, making the boat fly is worth doing before the next area. For everything else on this game, see the How to Fish guides hub.
In multiplayer there is an even faster kill that skips the phases entirely. Pile roughly 20 sticks before anyone casts, then detonate the whole pile in the same instant the Pufferfish is hooked. The burst damage kills it outright, before phase 2 ever starts. The same trick works on several other bosses in the game, so it is worth practicing once here.
FAQ
Can you beat the Pufferfish with melee weapons?
No, and you should not try solo. The Pufferfish sprays poison at close range and its contact damage is high, so knife or knuckle builds die almost immediately. Every working strategy keeps range: dynamite from a distance, then the Uzi.
How much dynamite do I need for the Pufferfish?
Plan for 18 to 20 sticks. At $25 a stick that is $450 to $500, which you can recover quickly by selling fish. The one-pile detonation uses most of it at once; the doorway solo pattern uses a few more.
What bait starts the Pufferfish fight?
The Carrot. You get it from the Tourist on the third island after handing him any Endangered Species fish: the Needlenose, the Seahorse, or the Bowlfish.
What do you get for beating the Pufferfish?
The Pufferfish Fin. Give it to the Tourist to complete his quest, and the fourth island unlocks. The exact item reward he hands over varies across community reports and is not fully confirmed yet.